This is default featured post 1 title

Go to Blogger edit html and find these sentences.Now replace these sentences with your own descriptions.This theme is Bloggerized by Lasantha Bandara - Premiumbloggertemplates.com.

This is default featured post 2 title

Go to Blogger edit html and find these sentences.Now replace these sentences with your own descriptions.This theme is Bloggerized by Lasantha Bandara - Premiumbloggertemplates.com.

This is default featured post 3 title

Go to Blogger edit html and find these sentences.Now replace these sentences with your own descriptions.This theme is Bloggerized by Lasantha Bandara - Premiumbloggertemplates.com.

This is default featured post 4 title

Go to Blogger edit html and find these sentences.Now replace these sentences with your own descriptions.This theme is Bloggerized by Lasantha Bandara - Premiumbloggertemplates.com.

This is default featured post 5 title

Go to Blogger edit html and find these sentences.Now replace these sentences with your own descriptions.This theme is Bloggerized by Lasantha Bandara - Premiumbloggertemplates.com.

Showing posts with label Internet Tunes. Show all posts

8/29/2011

Email Tracing

All email communications on the internet are possible by two protocols:
1) Simple Mail Transfer Protocol (SMTP port-25)
2) Post Office Protocol (POP port-110)

E-Mail hacking consists of various techniques as discussed below.

1) EMail Tracing :- Generally, the path taken by an email while travelling from sender to receiver can be explained by following diagram.

Mail-Path


The most effective and easiest way to trace an email is to analyze it's email headers. This can be done by just viewing the full header of received email. A typical email header looks something like this:


The above email header gives us the following information about it's origin and path:

a) Sender's email address :- atiles@destatis.de

b) Source IP address :- 141.203.33.92

c) Source mail server :- dsl-189-160-34-89.prod-infinitum.com.mx

d) Email client :- Thunderbird 2.0.0.6


Tips There are lots of ready-made tools available on the internet which performs email tracing very effectively and shows exact geographical location for email sender on the world map.


Recommended Tools
NeoTrace
http://www.neotrace.com
VisualRoute
http://visualroute.visualware.com
E-MailTracker
http://www.visualware.com

HOW to BLOCK Or UNBLOCK THE WEBSITE

FOR BLOCKING

Do The Following :

For eg you want to block www.xyz.com !


* Open the folder C:\WINDOWS\system32\drivers\etc

* There you will find a file named HOSTS

* Click on the file and press SHIFT and now right Click on it .

* From the right click menu select Open with .

* Now, select Notepad
to open the file from the list !

* Now, in the file under the line 127.0.0.1 localhost add another line as 127.0.0.2 www.xyz.com.

* Now, File>>Save !

For unblocking just follow the same procedure vice versa...!!!!!

HOW TO HACK A WI-FI NETWORK FOR FREE.

Wi-Fi (pronounced warfar) is a trademark of the Wi-Fi Alliance that manufacturers may use to brand certified products that belong to a class of wireless local area network  (WLAN) devices based on the IEEE 802.11 standards, which is by far the most widespread WLAN class today. Because of the close relationship with its underlying standards, the term Wi-Fi is often used as a synonym for IEEE 802.11 technology.
The Wi-Fi Alliance, a global association of companies, promotes WLAN technology and certifies products if they conform to certain standards of interoperability. Not every IEEE 802.11-compliant device is submitted for certification to the Wi-Fi Alliance, sometimes because of costs associated with the certification process. The lack of the Wi-Fi logo does not necessarily imply a device is incompatible with Wi-Fi devices.
As of 2010 update, IEEE 802.11 devices are installed in many personal computers, video game consoles, smartphones, printers, and other peripherals, and virtually all laptop computers.
Wireless Encryption
The majority of home and small business networks are encrypted using the two most popular methods:
  1. WEP
  2. WPA
WEP – Wired Equivalent Privacy – comes in 3 different key lengths: 64, 128, and 256 bits, known as WEP 64, WEP 128, and WEP 256 respectively.  WEP provides a casual level of security but is more compatible with older devices; therefore, it is still used quite extensively. Each WEP key contains a 24 bit Initialization Vector (IV), and a user-defined or automatically generated key; for instance, WEP 128 is a combination of the 24 bit IV and a user entered 26 digit hex key. ((26*4)+24=128)
WEP also comes in WEP2 and WEP+, which are not as common and still as vulnerable as the standard WEP encryption.
WPA – WiFi Protected Access – comes in WPA and WPA2, and was created to resolve several issues found in WEP. Both provide you with good security; however, they are not compatible with older devices and therefore not used as widely. WPA was designed to distribute different keys to each client; however, it is still widely used in a  (not as secure) pre-shared key (PSK) mode, in which every client has the same passphrase.
To fully utilize WPA, a user would need an 802.1x authentication server, which small businesses and typical home users simply cannot afford. WPA utilizes a 48 bit Initialization Vector (IV), twice the size of WEP, which combined with other WEP fixes, allows substantially greater security over WEP.


6 Most Commonly Used Wi-Fi Hacking Software.

  1. Airsnort
  2. Aircrack
  3. Netstumbler
  4. kismet
  5. Cowpatty
  6. Wireshark
For Wi-Fi Hacking Tools I Find This As Best Website:-http://www.wardrive.net/wardriving/tools *
For any problem write me at:-onlinepankajmishra@gmail.com
Enjy.Have a nice time.
Donot Misuse As You May Be Charged Under Criminal Activities.
*Purely My Opinion.

BEST POSSIBLE WAYS TO HACK INTO ANY EMAIL ACCOUNT

*ALL INFORMATION AVAILABLE HERE IS JUST FOR EDUCATIONAL PURPOSE AND FOR KNOWLEDGE BASE.*
BEST POSSIBLE WAYS TO HACK INTO ANY EMAIL ACCOUNT.
1. KEYLOGGRES:- The easiest way to hack an email is by using a keylogger (Also known as spy software). A keylogger is a small program that monitors each and every keystroke that a user types on a specific computer’s keyboard. To use it you don’t need to have any special knowledge. Anyone with a basic knowledge of computer can use it. With my experience I recommend the following keylogger as the best for hacking email.
BEST FREE KEYLOGGERS AVAILABLE ON INTERNET ARE
A.HEAVENWARD KEYLOGGER Download Link:- http://heavenward.ru/monitoring_software.php
B.REFOG Download Link:- https://www.refog.com/download.html
You need to have physical access to the  victims computer.If not get refog but it is provides only 30 days trial which means victim should use his computer and access his male account within 30 days.
2. PHISHING:- Process of attempting to acquire sensitive information such as usernames, passwords and credit card details by masquerading as a trustworthy entity in an electronic communication. It is the most popular way of stealing other’s password. Popular by the name of fake login (among those who knows it!!) the users land on a page where they are asked for their login information and they enter their username and password thinking it to be a real page but actually it is other way round. It submits all the details entered to the programmer or the coder.
You can search on google for fake login pages and download it.
3. RAT:-REMOTE ACCESS TROJAN Which requires advanced knowledge Of Computer.
WHAT TO DO IF ACCOUNT IS HACKED.
For Gmail:
It can be a big disaster if your Gmail account has been compromised as it may be associated with several services like Blogger, Analytics, Adwords, Adsense, Orkut etc. Losing access to your Gmail account means losing access to all the services associated it with too. Here is a list of possible recovery actions that you can try.
Step -1: Try resetting your password since it is the easiest way to get your account back in action. In this process Google may ask you to answer the secret question or may send the password reset details to the secondary email address associated with your compromised account. You can reset you password from the following link

Gmail Password Reset Link
https://www.google.com/accounts/ForgotPasswd
If you cannot find success from the Step-1 then proceed to Step-2.
Step-2: Many times the hacker will change the secret question and secondary email address right after the account is compromised. This is the reason for the Password Reset process to fail. If this is the case then you need to contact the Gmail support team by filling out the account recovery form. This form will ask you to fill out several questions like
1. Email addresses of up to five frequently emailed contacts

2. Names of any 4 Labels that you may have created in your account

3. List of other services associated with your compromised account

4. Your last successful login date

5. Account created date

6. Last password that you remember and many more…
You need to fill out this form as much accurately as possible. It is obvious to forget the dates of last login, account creation and similar terms. However you need to figure out the closest possible date/answers and fill out this form. This is your last chance! The more accurate the information filled out in the recovery form, the more the chances of getting your account back. You may reach the account recovery page form the following link

Account Recovery Form
http://www.google.com/support/accounts/bin/request.py?ara=1
For Yahoo and Hotmail:
Unfortunately for Yahoo/Hotmail there is no second option like filling out the form or contacting the support team. All you need to do is either answer the secret questions that you have setup or reset the password using the secondary email option.
To initiate the password reset process just click on the Forgot password link in your login page and proceed as per the screen instructions.
I hope this post will help you recover the lost account. I highly recommend that you also read my post on How to protect your email account from being hacked and Tips to find unauthorized activity on your Gmail account so that you always stay protected.
HOW TO SAFEGUARD YOUR EMAIL ACCOUNT.
Create strong passwords.
  1. Strong passwords are important protections to help you have safer online transactions.
  2. Keys to password strength: length and complexity.
  3. An ideal password is long and has letters, punctuation, symbols, and numbers.
  4. * Whenever possible, use at least 14 characters or more.
  5. * The greater the variety of characters in your password, the better.
  6. * Use the entire keyboard, not just the letters and characters you use or see most often.
  7. Test your password with a password checker
  8. A password checker evaluates your password’s strength automatically.
  9. Protect your passwords from prying eyes.
  10. * The easiest way to “remember” passwords is to write them down.
  11. It is okay to write passwords down, but keep them secure.
Common password pitfalls to avoid
Cyber criminals use sophisticated tools that can rapidly decipher passwords.
Avoid creating passwords using:
* Dictionary words in any language

Words in all languages are vulnerable.

* Words spelled backwards, common misspellings, and abbreviations

Words in all languages are vulnerable.

* Sequences or repeated characters

Examples: 12345678, 222222, abcdefg, or adjacent letters on your keyboard (qwerty).

* Personal information

Your name, birthday, driver’s license, passport number, or similar information.

5 tips to help keep your passwords secret

Treat your passwords with as much care as you treat the information that they protect.
Use strong passwords to log on to your computer and to any site where you enter your credit card number, or any financial or personal information—including social networking sites.
  1. Never provide your password over e-mail or in response to an e-mail request.
    • Internet “phishing” scams use fraudulent e-mail messages to entice you to reveal your user names and passwords, steal your identity, and more. Learn more about phishing scams and how to deal with online fraud.
  2. Do not type passwords on computers that you do not control
    • Computers such as those in Internet cafes, computer labs, kiosk systems, conferences, and airport lounges should be considered unsafe for any personal use other than anonymous Internet browsing.
    • Cyber criminals can purchase keystroke logging devices which gather information typed on a computer, including passwords.
  3. Don’t reveal passwords to others
    • Keep your passwords hidden from friends or family members (especially children) who could pass them on to other, less trustworthy individuals.
  4. Protect any recorded passwords
    • Don’t store passwords on a file in your computer, because criminals will look there first.
    • Keep your record of the passwords you use in a safe, secure place.
  5. Use more than one password
    • Use different passwords for different Web sites and services.

How To Hack a Website – 5 Simple Ways

You Can Use These Techniques To Hack A WeBsite.
  • Simple SQL Injection Hack
  • Cross site scripting
  • Denial of service
  • Cookie Poisoning
  • Password Cracking
To Check Your Hacking Skills Visit:-http://www.hackthissite.org/
Hack This Site is a free, safe and legal training ground for hackers to test and expand their hacking skills. More than just another hacker wargames site, we are a living, breathing community with many active projects in development, with a vast selection of hacking articles and a huge forum where users can discuss hacking, network security, and just about everything. Tune in to the hacker underground and get involved with the project.
For More Info Mail Me At:-onlinepankajmishra@gmail.com

Find Your Computer IP Address.

  1. Go to the Start menu, go to Run, and type “CMD” in the dialog box (without the quotes.
  2. Now you should see a dark (DOS) window

    Without the quotes, type “IPCONFIG” and press ENTER.
  3. Now you should see some network information, along with the IP ADDRESS of your computer listed.
  4. If more information is needed, other than the IP address, type the following from the same DOS box described in step two: IPCONFIG /ALL

    This will provide you with more network information on your computer.
  5. There are also websites available that can provide your computer IP, such as www.whatismyip.com.
  6. If you have a router/network set up, please note that the initial steps above will only show you the network’s IP from the router. For example, if you have a Linksys router installed, and perform the IPCONFIG command, it will show you something like “192.168.1.x” as opposed to your computer’s local/root address. For this reason, following STEP 5 above may be useful.

Top 10 Hacks on Flickr


1. The number one hack for Flickr would have to be Flickrleech. Flickrleech is a site developed by Andrew Houser (who is also a kick ass photographer), or simply Houser as he is often called, with the tagline, "because paging sucks."

When Houser released Flickrleech originally it would allow you to pull up any Flickr user's photos as a full page of thumbnails with no pagination. Although very cool, loading up 7,000 thumbnails wasn't exactly the nicest things to do to Flickr's servers and Houser actually changed his site to load 500 thumbnails at a time and today it sits at 200 thumbnails at a time.

Still, having the ability to browse a flickr user's photos at 200 thumbnails at a time is remarkable and allows you more photos on a single page than anything Flickr offers up themselves.

I'm constantly using Flickrleech to check out a new photographer's photos or to rapid fire go through someone's stream.

By the way, the bandwidth for Flickrleech is not cheap and Houser subsidizes it, so if you like it and use it might I recommend that you help the man out by making a donation to his Paypal account that he has on the site.


2. The number two hack for Flickr is a newer one and was released earlier this month by Intel's Eric Appel and is called SmartSetr. One of the annoying things about Flickr is that when you want to create a set you must do it manually. Even with batch tools this gets tedious and having to add every new photo to a set every single time sucks. So Eric developed SmartSetr. SmartSetr allows you the ability to build sets that are organized around the concepts of tags, dates, and other metadata associated with a photo.

If, for instance, you want to build a set called Neon Days and Neon Nights (like I did) that holds all of your photos of neon signs, by building a SmartSet you can simply tell flickr to add any photo tagged neon to this set. Although SmartSetr isn't dynamic, Eric refreshes your sets for you once a day and things get updated. It's also really cool that you can organize your set by interestingness, so that your best photos show up first in the set -- something you can't do on Flickr. More from Eric directly.

3. The number three hack for Flickr is a greasemonkey one called Flickr Multi Group Sender. It was developed by Steeev (who does some of the best Flickr development work around) One of the problems with Flickr's add to group function is that it is painfully and woefully slow. I'm not sure if this is because Flickr is trying to load up little mini thumbnail icons for every group or if it's something to do with how you access their database but it's weak sauce. But multi group sender makes this much easier. Multi group sender allows the add to groups function for photos on flickr super fast. You can also add to multiple groups at once by simply holding down the control key... opps, I mean command key (I keep forgetting I'm on a Mac).. and selecting another group. Careful with adding your photos to too many groups though. Adding your photo to more than about 10 groups gets you dinged in interestingness.

4. The number four hack for Flickr is another greasemonkey one. This one is called Flickr rich edit and it was written by Jason Rhyley. Sometimes when you say something, you really want to say something. Unfortunately natively Flickr has no rich edit tools and so users must be familiar with how to manually mark up their text or they can just use this tool. By using rich text edit you are able to add rich text edit tools above text boxes on Flickr so that you can better get your point across when you need to.

5. Tabblo. This is kind of an unusual one. Maybe not so much of a hack, but it sure feels like one. Tabblo is a photosharing site that allows you the ability to customize the feel, layout, tone and design of your photo page. The yin and the yang of Flickr is that everyone's pages look the same. On the one hand this gives Flickr a very elegant, almost like a virtual art gallery or museum feel. On the other hand sometimes people want more customization over how their photos are presented. Some companies like SmugMug make this customization part of how they diferentiate from Flickr. Flickr is torn because while you might like to give users more control over the design of the photos, if you're not careful, the next thing you know the place ends up looking like MySpace.

Enter Tabblo. Tabblo uses the Flickr API to import your photos into their site and then allows you the ability to design a page however you like. The nice thing about Tabblo is that unlike SmugMug the site is free and with a direct Flickr import function makes it super easy to design special custom pages using your Flickr photos. Here's a tabblo with some of my shots from New Orleans last year.

6. Flickrmud. One of the problems for some Flickr users is that because the site is popular ofentimes it gets blocked. A while back Flickr was being blocked in the entire UAE. There have been reports of libraries blocking Flickr and certainly businesses blocking Flickr who don't want their employees wasting away valuable company time on social networking or seeing the occasional porn shot that creates company liability. While one answer is to simply buy your own laptop with EVDO and bring it to work, this isn't always the most economical approach. But if you are experiencing Flickr blockage somewhere check out FlickrMud. How Flickr mud works is that you simply change the url to access Flickr. Instead of accessing thomashawk's flickrstream like this: http://www.flickr.com/photos/thomashawk. You access it with this url instead: http://www.flickr.mud.yahoo.com/photos/thomashawk. By adding the .mud.yahoo before the .com oftentimes you can access the site because this way of accessing Flickr is much less known and less likely to be blocked. Mum's the word on this one of course ;)


7. Moo Cards. Again, not so much of a Flickr hack as a tool for the flickr photographer. One of the problems with the outside world (yes even with Stewart and Caterina on the cover of Time magazine, etc. etc.) is that outside your immediate bubble of friends, a whole chunk of the world has no idea what Flickr is. As a photographer out there shooting all the time people will ask me where they can see my work. Even if you say "flickr" "thomas hawk" etc. People will forget. By ordering up some Moo cards (they are only about $25 for 100) you can give these cards out to people when they ask where they can see the shots.

Of course one hack with your Flickr Moo cards is that you don't actually have to send them to your Flickrstream. My Flickr Moo cards have my Zooomr stream ID url on there instead. Opps, did I just say that, Doh!


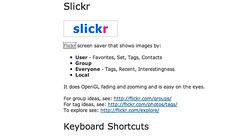
8. Slickr. One of the things that is cool about Flickr is that there is an amazing amount of fanastic images online. This is cool and all but Flickr's slide show functionality sucks, it's not full screen, etc. This is where Slickr comes in. Slickr allows you the ability to point Slickr to someone's photostream, your photos marked favorites, etc., etc. and then actually download full high res photos of all of whatever you point it to to your computer. It was developed by Gabriel Hanford. Once on your hard drive you can better make use of these images for your screen saver or for your desktop backgrounds and all that. One of my favorite things to do is to sit back and watch my Media Center PC rotate through my favorites from Flickr on beautiful full high res clarity.

One note with this. You might want to check out the photo license of the photos that you choose to download with Slickr. Although Slickr works with all licenses, technically you'd be breaking the rules by downloading an all rights reserved licensed photo. Creative Commons licensed photos of course (like mine) are free to use for non commercial (in my case) use and if you want to download all of my images for your screen saver, desktop, etc., or even just one of my sets like Superfaves, feel free.


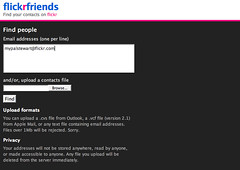
9. Flickr Friends (formerly Flickr Stalkr). Flickr Friends got off to a rough start originally at Flickr. Developed by James Newbery it was initially named Flickr Stalkr and well, that just didn't sound right and so they saw themselves get nipped in the bud early on. Subsequently though the site relaunched as Flickr Friend Finder and is a way for you to find all of your friends (or ex-girlfriends, opps, did I just say that too?) on Flickr. With Flickr Friend Finder you simply enter in a string of email addresess (or upload your address book to them) and they will return back to you everyone who is on Flickr. You can then add them as friends to make sure to keep tabs on what they are up to photographically speaking. James has the following privacy statement up on his site:

"Your addresses will not be stored anywhere, read by anyone, or made accessible to anyone. Any file you upload will be deleted from the server immediately."

...of course it's up to you whether or not you think it's a good idea or right to use your friend's email addresses this way.


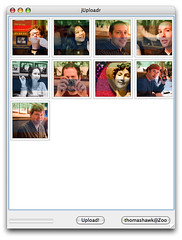
10. jUploadr. One of the things about Flickr's bulk uploader tool (in my opinion) is that it is not very good. Especially on a Mac it is very slow to load, won't strip the .jpg titles from the names of my photos, etc. jUploader was developed by Steve Cohen and offers a better, faster, way to upload. You can enter in default tags, descriptions, etc. for all of your photos or you can easily select photos to bulk tag/descript before uploading to Flickr. jUploader is also our official uploader for Zooomr as well and if you want to upload your shots to Flickr and Zooomr, once you are done with one you can simply click on the other to send your photos there as well. jUploadr runs on Windows, Linux and OS X.

How to Get a New IP Address Even If You Have a Static IP

This trick is very useful for those who cannot use this method because the have static IP address.


To start off, you need a direct connection to your modem and computer. If you have a router, disconnect it and directly hook up your modem to your computer.

1. Open up the command prompt by pressing Start->Run and typing in cmd

2. In the command prompt, type “Ipconfig/all”. This will tell you your current IP Address. After, type “ipconfig/release”. Keep the command prompt open for easy access.

3. Go to “Network Connections” (accessible through the control panel). Right click “Local Area Connection” and click “Properties”

4. With “Internet Protocol (TCP/IP) selected, click the “Properties” button.

5. A new window will open. Under the “General” tab, select “Use the Following IP address”. Under “Ip Address”, put “10.0.0.1″. Press the “Tab” key on your keyboard.

6. Press Ok on both open windows.

7. Repeat steps 3-4. Under the “General” tab, press the radio button “Automatically Assign Me an Ip Address”. Press ok on both windows.

8. Go back to the command prompt and type in “Ipconfig/all”. You’ll now notice you have a new IP address.

via:blogiseverything.com

EXCLUSIVE:Hacked-Surf with firefox and make money...

Just follow these simple steps

First of all you need Firefox for this to work.

1)Skip this step if u already own a paypal account
Go to https://www.paypal.com/ and sign up
Create a paypal premier account (this is for free)

When asked to give credit card details click on CANCEL

2)Now,
Go to
http://tinyurl.com/3925vb
And register.

You'll be paid just to click on their ads.
The more you click the more you earn.

How You Make Money
You make money by simply visiting websites for at least 30 seconds/visit. They will pay you $0.01 for each website you visit and $0.01 for each website your referrals visit. The best part is you can have an unlimited amount of referrals! To keep Bux from getting top-heavy you will only earn money from those that you directly refer. This gives everyone who participates in the program a fair advantage to earn the most amount of money because you have the potential to earn more than your sponsor! Payments are issued via PayPal on a daily basis but you must request for a payment to be processed. Once requested, your payment will be issued within 24-48 hours (usually sooner). You must earn at least $10 to receive payment.

3)Make it automatic (basically, leave Firefox open, and you'll make money )

ADD ON 1


ADD ON 2

Install those 2 Addons
(GreaseMonkey and ReloadEvery)

4)Now, go to http://bux.to/surf.php

Right Click Any where on the page > ReloadEvery > Enable
Right Click Again > ReloadEvery > Custom
Set it to 1minute and 30Seconds. (This means every 1minute and 30 seconds the page will refresh)

5)Next, Install this file (go to the following url in FireFox) http://www.gss.org.yu/bux/bux.user.js (Greasemonkey will ask you to install the file, click 'Install')

6)Now, go back to http://bux.to/surf.php, and leave the page open 24/7 and every 1minute and 30seconds the page will refresh, and if a new ad appears, you will automatically click it.

EASY MONEY .

7) Use the money to pay for your rapidshare accounts , or something else

i have earned 10 dollars after clicking their ads for a month and i thought i could just spread their info

in this way i can pay for at least the internet rental

i am not telling you will become millionares but while surfing just make the process automatic and you wont even notice

How TO Make Your Internet As Fast as Possible

Here are Registry Tweaks and Scroll down to see Patches


1.Increase bandwidth by tweaking QoS in Windows XP Pro

The following tweak applies only to Windows XP Professional edition.

The default system behavior is that all 100% bandwidth is available, however, if there is a running application that indicates to the OS it needs to send high priority/real time data, then as long as it has the socket open, Windows XP will restrict “best effort” traffic to 80% of the bandwidth so that high priority traffic can be accommodated. Basically, applications can make this request to the operating system for QoS support using the QoS application programming interfaces (APIs) in Windows and this only applies if a specific app is requesting QoS.

If you'd like to change how much bandwidth is reserved for QoS (the default is 20% of the total bandwidth), do the following:

1. Make sure you're logged in as "Administrator" (not just any account with admin privileges).
2. Navigate to START>Run and type: gpedit.msc
3. Navigate to Local Computer Policy > Administrative Templates > Network > QOS Packet Scheduler
4. In the right window, double-click the limit reservable bandwidth setting
5. On the setting tab, check the enabled setting.
6. Where it says "Bandwidth limit %", change it to read 0 (or whatever percentage you want to reserve for high priority QoS data)
7. Click OK, close gpedit.msc


Under START > My Computer > My Network Connections > View Network Connections, right-click on your connection and under Properties (where it lists your protocols), make sure QOS Packet Scheduler is enabled.


The tweak desribed below helps boost priority for DNS & hostname resolution in general. What this means is, it helps web pages load faster, and has negligible effect on downloads (not counting the couple of ms gain with the host resolution at connect-time).

Applying this tweak assumes some proficiency in editing the Windows Registry using Regedit (Start > Run > type: regedit). As always, backup your Registry before making any changes so you can revert to the previous state if you don't like the results.


2.Host Resolution Priority Tweak
host name resolution priority
Windows 2k/XP

First, open the Windows Registry using Regedit, and (after backing up) navigate to:
HKEY_LOCAL_MACHINE\SYSTEM\CurrentControlSet\Services\Tcpip\ServiceProvider


Note the following lines (all hex dwords):
Class = 008 (8) - indicates that TCP/IP is a name service provider, don't change.

LocalPriority = 1f3 (499) - local names cache
HostsPriority = 1f4 (500) - the HOSTS file
DnsPriority = 7d0 (2000) - DNS
NetbtPriority = 7d1 (2001) - NetBT name-resolution, including WINS


What we're aiming to do is increase the priority of the last 4 settings, while keeping their order. The valid range is from -32768 to +32767 and lower numbers mean higher priority compared to other services. What we're aiming at is lower numbers without going to extremes, something like what's shown below should work well:

Change the "Priority" lines to:
LocalPriority = 005 (5) - local names cache
HostsPriority = 006 (6) - the HOSTS file
DnsPriority = 007 (7) - DNS
NetbtPriority = 008 (8) - NetBT name-resolution, including WINS


Windows 9x/ME

The tweak is essentialy the same as in Windows 2000/XP, just the location in the Registry is slightly different. For a more detailed description see the Windows 2000/XP section above.

Open the Windows Registry using Regedit, and (after backing up) navigate to:
HKEY_LOCAL_MACHINE\System\CurrentControlSet\Services\VxD\MSTCP\ServiceProvider

You should see the following settings:
Class=hex:08,00,00,00

LocalPriority=hex:f3,01,00,00
HostsPriority=hex:f4,01,00,00
DnsPriority=hex:d0,07,00,00
NetbtPriority=hex:d1,07,00,00

The "priority" lines should be changed to:
LocalPriority=hex:05,00,00,00
HostsPriority=hex:06,00,00,00
DnsPriority=hex:07,00,00,00
NetbtPriority=hex:08,00,00,00

Reboot for changes to take effect
.


In addition to the tweaks already covered in Win 2k/XP Registry Tweaks and More Win 2k/XP Tweaks, the Windows XP Service Pack 2 introduces a few new issues covered in the article below. Please make sure you understand what you are doing before making any changes to your Operating System. Note the information below only applies to Windows XP Service Pack 2.


3.Remove the limit on TCP connection attempts

Windws XP SP2 introduces a few new twists to TCP/IP in order to babysit users and "reduce the threat" of worms spreading fast without control. In one such attempt, the devs seem to have limited the number of possible TCP connection attempts per second to 10 (from unlimited in SP1). This argumentative feature can possibly affect server and P2P programs that need to open many outbound connections at the same time.

Rant: The forward thinking of Microsoft developers here is that you can only infect 10 new systems per second via TCP/IP ?!?... If you also consider that each of those infected computers will infect 10 others at the same rate:
second 1: 1+10 computers
second 2: 10+10*10 computers (110 new ones)
second 3: 10+100*10 computers ( 1110 new ones)
second 4: 10+1000*10 computers (11110 new ones)

....
all the way to 10*60 + 10^60 computers in a single minute (that's a number with 60 digits, or it would far exceed Earth's population). Even if we consider that 90% of those computers are unreachable/protected, one would still reach ALL of them within a minute.

In other words, even though it is not going to stop worm spreading, it's going to delay it a few seconds, limit possible network congestion a bit, and limit the use of your PC to 10 connection attempts per second in the process ! I have no problem with the new default setting limiting outbound connection attempts. Still, users should have the option to easily disable or change this setting. I might be going out on a limb here, but ever since the introduction of Windows XP I can't help thinking that I dislike all the bult-in Windows "wisardry" in a sense that the system also limits user access. That irritating trend to ease the mental load on end users is somewhat insulting, considering that Windows is to make the more "intelligent" choice instead of the end user, as well as limit their access to tuning such settings...
End of rant.

With the new implementation, if a P2P or some other network program attempts to connect to 100 sites at once, it would only be able to connect to 10 per second, so it would take it 10 seconds to reach all 100. In addition, even though the setting was registry editable in XP SP1, it is now only possible to edit by changing it directly in the system file tcpip.sys. To make matters worse, that file is in use, so you also need to be in Safe mode in order to edit it.

You only need to worry about the number of connection attempts per second if you have noticed a slowdown in network programs requiring a number of connections opened at once. You can check if you're hitting this limit from the Event Viewer, under System - look for TCP/IP Warnings saying: "TCP/IP has reached the security limit imposed on the number of concurrent TCP connect attempts". Keep in mind this is a cap only on incomplete outbound connect attempts per second, not total connections. Still, running servers and P2P programs can definitely be affected by this new limitation. Use the fix as you see fit.

To change or remove the limit, you can use the following program:

Event ID 4226 Patcher v2.11


http://www.speedguide.net/files/xp_sp2/EvID4226Patch211a-en.zip


- A patching program for removing or changing the limit imposed on connection attempts in SP2. The patcher has the ability to restore tcpip.sys back to the original... Still, you might want to back up tcpip.sys, use it at your own risk. The author of this patch can be reached @ http://www.lvllord.de/

4. Recommended settings for Windows 2000 / XP
Windows 2000 & XP, unlike NT supports large windows as described in RFC1323 ( the 'RcvWindow' has a maximum value of 2**30 rather than 64K), and includes some other improvements over its predecessors you can use to speed up any TCP/IP transfers. , the descriptions and other options are added to provide you with better understanding and enable you to customize your settings.

All the following entries, unless otherwise noted should be placed in the Windows 2000/XP Registry under the key

HKEY_LOCAL_MACHINE\SYSTEM\CurrentControlSet\Services\Tcpip\Parameters

TCPWindowSize

The value of TCP Window in the Windows 2000 Registry is DWORD, representing number of bytes, with range from 0 to 2^30. The recommended values (in red) optimize TCP for any high speed Internet connection and work best in most cases, however if you'd like to use a custom value follow these guidelines:

For best results, the TCPWindow should be a multiple of MSS (Maximum Segment Size). MSS is generally MTU - 40, where MTU (Maximum Transmission Unit) is the largest packet size that can be transmitted. MTU is usually 1500 (1492 for PPPoE connections). To determine the MTU value of your ISP, check out the Advanced Registry Editing section of our site.

There are three places in the Windows 2000 Registry where you can add the TCP Window parameter.

HKLM/SYSTEM\CurrentControlSet\Services\Tcpip\Parameters
GlobalMaxTcpWindowSize="256960" (DWORD, number of bytes) Valid range is from MSS to 2^30. Add the value as a decimal. Note: For best results RWIN has to be a multiple of MSS lower than 65535 times a scale factor that's a power of 2, i.e. 44 x 1460 = 64240 x 2^2 = 256960. If you choose to use a RWIN lower than 65535, you can simply make it multiple of MSS and turn scaling off (Tcp1323Opts=0)

HKLM\SYSTEM\CurrentControlSet\Services\Tcpip\Parameters
TcpWindowSize="256960" (DWORD, number of bytes) Valid range is from MSS to 2^30. Add the value as a decimal. TcpWindowSize can also exist under TcpipParametersInterface - if added at this location, it overrides the global setting for this particular . Note (10/20/00): Seems MS has found another bug in Windows 2000, the TCPWindowSize should be configured with the global setting (GlobalMaxTcpWindowsSize) rather than this one - Q263088

Note: For best results RWIN has to be a multiple of MSS lower than 65535 times a scale factor that's a power of 2, i.e. 44 x 1460 = 64240 x 2^2 = 256960. If you choose to use a RWIN lower than 65535, you can simply make it multiple of MSS and turn scaling off (Tcp1323Opts=0)

Tcp1323Opts

Tcp1323Opts is a necessary setting in order to enable Large TCPWindow support as described in RFC 1323. Without this parameter, the TCPWindow is limited to 64K.

HKLM\SYSTEM\CurrentControlSet\Services\Tcpip\Parameters
Tcp1323Opts="1" (DWORD, recommended setting is 1. The possible settings are 0 - Disable RFC 1323 options, 1 - Window scaling but no Timestamp options, 3 - Window scaling and Time stamp options.)

Note: Tcp1323Opts="3" might help in some cases where there is increased packet loss, however generally you'll achieve better throughput with Tcp1323Opts="1", since Timestamps add 12 bytes to the header of each packet.

DefaultTTL

DefaultTTL determines the time in seconds and the number of hops a packet lives. While it does not directly affect speed, a larger value increases the amount of time it takes for a packet to be considered lost, discarded and retransmitted. A value that's too small can cause packets to be unable to reach distant servers at all.

HKLM\SYSTEM\CurrentControlSet\Services\Tcpip\Parameters
DefaultTTL="64" (DWORD, recommended setting is 64. Other settings that are widely used are 128 and 32)

EnablePMTUDiscovery

When set to 1 (True), TCP attempts to discover MTU automatically over the path to a remote host. Setting this parameter to 0 causes MTU to default to 576 which reduces overall performance over high speed connections. Note that this setting is different than our Windows 9x recommendation.

HKLM\SYSTEM\CurrentControlSet\Services\Tcpip\Parameters
EnablePMTUDiscovery="1" (DWORD - boolean, valid settings are 0-->False and 1-->True. Many connections perform better with this entry at 1, however, if you prefer to set your upstream to send fixed 1500 packets, you might want to use 0 instead). When set at 1, establishing connections and initial transfer speed might slow down a bit, however you will get better throughput if somewhere in the path large packets need to be fragmented.

EnablePMTUBHDetect

Setting this parameter to 1 (True) enables "black hole" routers to be detected, however it also increases the maximum number of retransmissions for a given segment. In most cases you'd want to keep BHDetect to 0 (False).

HKLM\SYSTEM\CurrentControlSet\Services\Tcpip\Parameters
EnablePMTUBHDetect="0" (DWORD - boolean, valid settings are 0-->False and 1-->True. Recommended setting is 0)

SackOpts

This parameter controls whether or not SACK (Selective Acknowledgement) support is enabled, as specified in RFC 2018. SACK is especially important for connections using large TCP Window sizes.

HKLM\SYSTEM\CurrentControlSet\Services\Tcpip\Parameters
SackOpts="1" (DWORD - boolean, recommended setting is 1. Possible settings are 0 - No Sack options or 1 - Sack Option enabled).

TcpMaxDupAcks

This parameter determines the number of duplicate ACKs that must be received for the same sequence number of sent data before "fast retransmit" is triggered to resend the segment that has been dropped in transit.

HKLM\SYSTEM\CurrentControlSet\Services\Tcpip\Parameters
TcpMaxDupAcks="2" (DWORD - range 1-3, recommended setting is 2).


Patches


This Includes

1. sguide_tweak_2k.zip
Description: Generic patch for Windows XP and Windows 2000 (all versions). This patch will optimize your TCP/IP Registry settings for high speed Internet connections. To install, extract the .inf file first, then double-click (or right-click on filename and choose install from the pull-down menu) and reboot for changes to take effect.


http://www.speedguide.net/files/sguide_tweak_2k.zip


2.sguide_tweak_2k_pppoe.zip

Description: Generic patch for Windows XP/2000 and DSL connections using PPPoE. This patch will optimize your TCP/IP Registry settings for high speed Internet connections. It is specifically designed for PPPoE DSL connections. To install, extract the .inf file first, then double-click (or right-click on filename and choose install from the pull-down menu) and reboot for changes to take effect.


http://www.speedguide.net/files/sguide_tweak_2k_pppoe.zip


3. winxp_dnscache.zip

Description: Patch Windows 2k/XP not to cache failed DNS entries. By default, when a DNS lookup fails (due to temporary DNS problems), Windows still caches the unsuccessful DNS query, and in turn fails to connect to a host regardless of the fact that the DNS server might be able to handle your lookup seconds later. This patch fixes the problem by configuring the DNS client to continue sending queries to an unresponsive network. To install, save to your HD, unzip the .reg file, then double-click the filename.

Web Patches - faster loading of Web Pages

The following patch increases Web page loading speed, by doubling the number of possible concurrent open connections. For example, imagine a web page has 20 images and some text - in order for your browser to get all these files, it opens 2 or 4 concurrent connections, depending on the Web server. Increasing the number of open connections allows for faster retrieving of the data. Please note that the patch sets some values outside of the HTML specs. If you decide to install it, backup your Registry first. Changes will take effect after you reboot. Download the patch appropriate for your OS:

OS: Windows 9x/ME

http://www.speedguide.net/files/sg_webtweak_9x.zip


OS: Windows 2K/XP/2k3


http://www.speedguide.net/files/sg_webtweak_2k.zip


TCP OPTIMISER

Image

Description: The TCP Optimizer is a free, easy Windows program that provides an intuitive interface for tuning and optimizing your Internet connection. Just download and run, there is no installaion required. The program makes it easy to find the best MTU and RWIN values, test latency and tweak all the important broadband related registry parameters. The Optimizer can be helpful with tuning any Internet connection type, from dialup to Gigabit+


URL http://www.speedguide.net/files/TCPOptimizer.exe

Internet Speed Up {Part 2}

uning up MTU (Maximum
Transmission Unit) to speed up Internet access


Now let me tell you
one important fact related with tuning. Value of MTU depends upon how fast a
connection you have, what kind of activities you perform (ask yourself a
question. Are your a mild, average or high end user of Internet ? To put it in
other words, Do you download little or nothing, or are an average surfer or are
Internet savvy individual and download everything from programs,apps,patches to
watching Internet audio/video real-time content?) Depending upon who you are as
a user and what kind of connection (modem,dsl,cable or in rare cases T1/T3),
this tuning may have little to significant effect on your Internet experience.
All right MTU stand for Maximum Transmission Unit.

Value of MTU decides
the size of Internet data packet. Bigger the size, more you can transfer.


Analogy could be made with a bucket. If bucket is small, you can carry
little but it would be no strain on your strength. Bigger the bucket, more you
can carry but it strains your physical strength. (Well! Its not that simple but
good enough to understand). Objective should be find a perfect balance which
works for you. I think maximum that you can put is as value of MTU is 1500 (but
could be higher for your specific network) and it may not make sense making it
smaller than 68.


Again this is a registry tweak unless and until you
have a tweaking utility that can do it for you.

Open Registry by going to
START-RUN and entering REGEDIT and Navigate to
HKEY_LOCAL_MACHINE\SYSTEM\CurrentControlSet\Servic
es\Tcpip\Parameters\Interfaces\ ID for Adapter. For this right click on right
pane and add a key by the name MTU. For this key you can add a DWORD value from
68 to 1500 (or higher value is certain cases).


If you put less than 68,
it will default to 68. If you put a value higher than 1500 or your Network
permitted max, it will default to permitted
max.


Enable automatic path MTU size detection and
impro
As stated on previous tip (Tip 52), MTP size plays an important role in
deciding Internet speed. But its not so easy to determine the right value of
MTU. For those of us who fall in this category and would prefer computer to find
that for us, follow trick may work. I can not say with confidence whether this
would work across all network but it should and there is no harm in trying it
out. Now before I do that let me tell you what this action will
do.

Applying this trick, you would ask computer to automatically find out
the maximum MTU size possible in the connection path to a host. This value could
be different for different sites. I think this trick should pick the lowest
common denominator across a particular path. Typically If MTU size is not
optimized, this job has to be done by a router which would mean a significant
waste of time (small chunks adds to a considerable loss if you imagine that
there are billions of packets involved across the whole Internet) resulting in
poor throughout and congestion on cyber lanes. All right this key is called
EnablePMTUDiscovery.


Again this is a registry.Open Registry by going
to START-RUN and entering REGEDIT and Navigate to
HKEY_LOCAL_MACHINE\SYSTEM\CurrentControlSet\Servic
es\Tcpip\Parameters\Interfaces\ ID for Adapter. For this right click on right
pane and add a key by the name EnablePMTUDiscovery. For this key you can add a
DWORD boolean value of 0 or 1 with 1 being TRUE (value that enables auto
detection).


Since we are trying this tweak, set to 1 and enable the TCP
to attempt to discover the MTU size over the specific path to host. Microsoft
has an interesting article on many similar tips <&gt; and is titled TCP/IP
and NBT Configuration Parameters for Windows

Speed Up Internet [Part 1]

Windws XP SP2 introduces a few new twists to TCP/IP in order to babysit users
and "reduce the threat" of worms spreading fast without control. In one such
attempt, the devs seem to have limited the number of possible TCP connection
attempts per second to 10 (from unlimited in SP1). This argumentative feature
can possibly affect server and P2P programs that need to open many outbound
connections at the same time.

In other words, even though it is not going
to stop worm spreading, it's going to delay it a few seconds, limit possible
network congestion a bit, and limit the use of your PC to 10 connection attempts
per second in the process ! I have no problem with the new default setting
limiting outbound connection attempts. Still, users should have the option to
easily disable or change this setting. I might be going out on a limb here, but
ever since the introduction of Windows XP I can't help thinking that I dislike
all the bult-in Windows "wizardry" in a sense that the system also limits user
access. That irritating trend to ease the mental load on end users is somewhat
insulting, considering that Windows is to make the more "intelligent" choice
instead of the end user, as well as limit their access to tuning such
settings...
End of rant.

With the new implementation, if a P2P or some
other network program attempts to connect to 100 sites at once, it would only be
able to connect to 10 per second, so it would take it 10 seconds to reach all
100. In addition, even though the setting was registry editable in XP SP1, it is
now only possible to edit by changing it directly in the system file tcpip.sys.
To make matters worse, that file is in use, so you also need to be in Safe mode
in order to edit it.

Unfortunately there exists no REG-key which could
easily be set (would be so nice and easy, right? *smile*). The file TCPIP.SYS in
the directory C:\WINDOWS\SYSTEM32\DRIVERS and C:\WINDOWS\SERVICEPACKFILES\I386
has to be changed (system dependend eventually in C:\WINDOWS\SYSTEM32\DLLCACHE,
too).


Needed things:
- Windows XP SP2 (from RC2 upwards) or Windows
2003 Server SP1 beta
- The Patcher
- a small amount of
time

Download the EventID 4226 Patcher Version 2.23d (english) from
.

Instructions
**************
1. Just download the patcher and execute it. It will
automatically find the windows directory and ask, if it should
increase/decrease. By default the concurrent connection limit will be lifted to 50.

2. For higher values, please check the help with parameter /?.


3.After a successful patch, the new TCPIP.SYS will be automatically installed.
After that, the computer should be restarted.

free counters

Submit ExpressSEO Services & Tools